
A complete start from zero guide
How to gift ARMORED with Jupiter Wallet
Download Jupiter Wallet, learn the basics, buy ARMORED through the linked swap, and send a gift with clear checks at every step.
2026-11-01 Asia/Manila · English edition · No account or wallet is needed to read.
Already received a gift? Follow the recipient claim guide. You do not need to buy tokens or deposit US$2 to unlock an existing gift.
Go straight to the illustrated walkthroughTry the learning quest
LEARN · PRACTISE · GIFT THOUGHTFULLY
Make your first wallet a little less mysterious.
Eight short quizzes, a Wallet Readiness check and a final gifting exam. No purchase is needed. Eligible account holders can earn real Kitten Points under the usual learning limits.
- 1. Meet your wallet · 3 questions · Read the lesson
- 2. Create your Jupiter Wallet · 3 questions · Read the lesson
- 3. Plan your fuel · 3 questions · Read the lesson
- 4. Become a quote detective · 3 questions · Read the lesson
- Wallet Readiness check · 6 questions · Read the lesson
- 5. Make the gift personal · 3 questions · Read the lesson
- 6. Review, then send · 3 questions · Read the lesson
- 7. Help your friend receive · 3 questions · Read the lesson
- 8. Stay calm and know the limits · 3 questions · Read the lesson
- The thoughtful gifter exam · 10 questions · Read the lesson
Open your private learning quest and use /walletquest after setup.
01 / A COMPLETE START FROM ZERO GUIDE
How to gift $ARMORED with Jupiter Wallet
Download Jupiter Wallet, create your wallet, buy $ARMORED, send a thoughtful gift, and help the recipient understand companion access.

You do not need to know crypto language before you begin. Read one stage, complete its checks, then move to the next. The sender and recipient each keep control of their own wallet.
Edition: 1 November 2026, Asia/Manila. Public screens and official documentation checked for this edition. Buttons, fees and availability can change.
Sources for this chapter
02 / BEGINNER WALKTHROUGH
Start here and choose your route
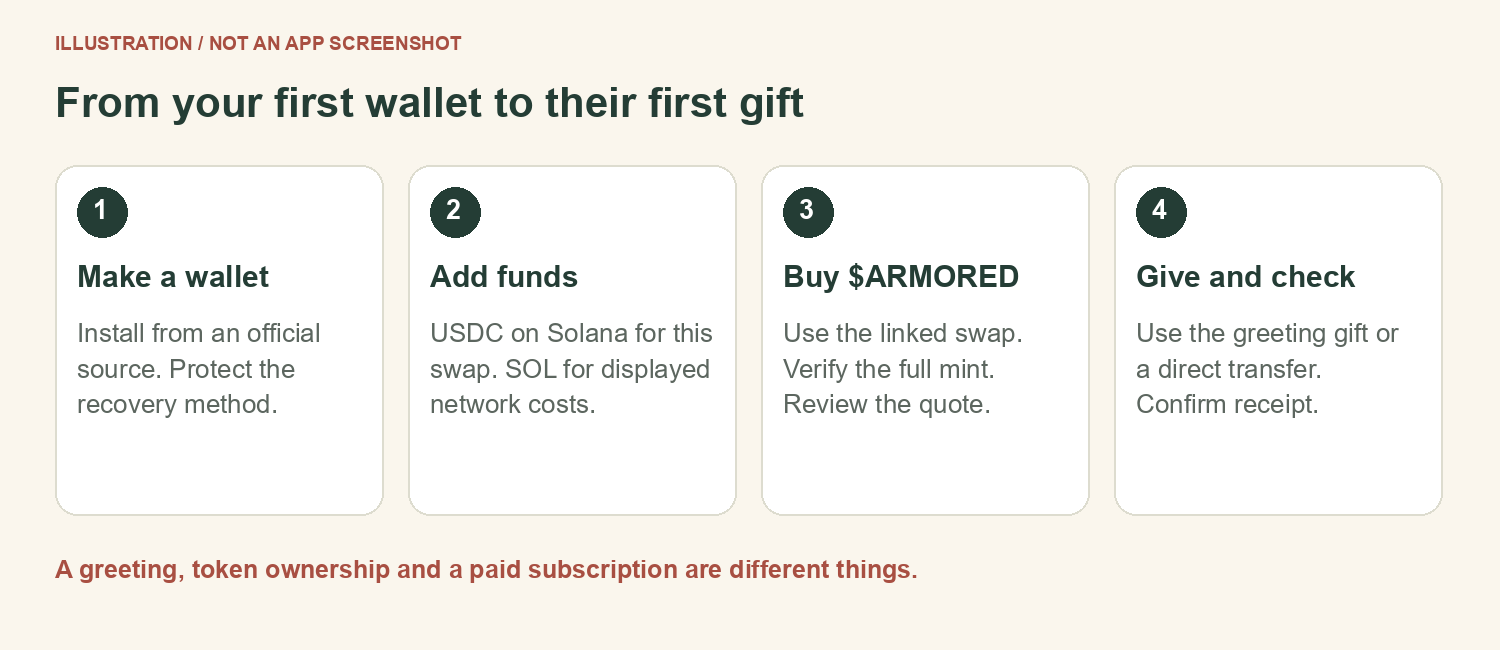
You can make a greeting without buying crypto. Add tokens only if you and the recipient understand and want them.
| You want to give | Use this route |
|---|---|
| A personalized card only | Greeting Studio; leave the token option off. Pages 16-17. |
| Tokens with a card | Buy first, then use the optional Jupiter Send gift. Pages 5-22. |
| Tokens to an existing wallet | Buy first, then use a direct transfer. Pages 23-24. |
| Companion access or a subscription | Read pages 25-26 before spending. No verified gift-subscription checkout was found. |
Find your stage
Basics and safety: pages 3-4. Wallet creation: 5-7. USDC and SOL: 8-10. Buying: 11-14. Gift choices: 15. Greeting gift: 16-22. Direct transfer: 23-24. Companion access: 25-26. Troubleshooting: 27-28. Checklist: 29. Official links: 30.
Sources for this chapter
03 / BEGINNER WALKTHROUGH
The crypto words you actually need
Think of this as learning the labels on a new payment tool. You do not need to study trading to give a small gift.
| Word | Plain meaning |
|---|---|
| Blockchain | A shared public record of transactions. This guide uses the Solana network. |
| Wallet | An app that controls your keys and shows balances recorded on the blockchain. |
| Self custody | You control access. Losing the recovery method can mean losing the assets. |
| SOL | Solana's native coin. Network transaction costs are paid in SOL. |
| USDC | A dollar-linked stablecoin. Here it is the token you exchange for ARMORED; it still has issuer and market risks. |
| $ARMORED | The Armored Kitten token. Its market value can rise, fall or become very small. |
| Mint or contract address | The identifier of a token. It is not where you send your gift. |
| Receiving address | The destination account in the recipient's wallet. Copy it from Receive. |
| Swap | Exchange one token for another. A swap is different from sending to a friend. |
| Transaction signature | The public reference for an on-chain transaction; useful for checking status. |
| Mainnet / Devnet | The real network / a separate test network. Test tokens do not buy real ARMORED. |
A token amount and a dollar value are different. Giving 1,000 ARMORED means 1,000 tokens; it does not mean $1,000 or a fixed amount of companion access.
Sources for this chapter
04 / BEGINNER WALKTHROUGH
Protect three very different things
Pause here before creating a wallet. Knowing the difference prevents the most damaging beginner mistakes.
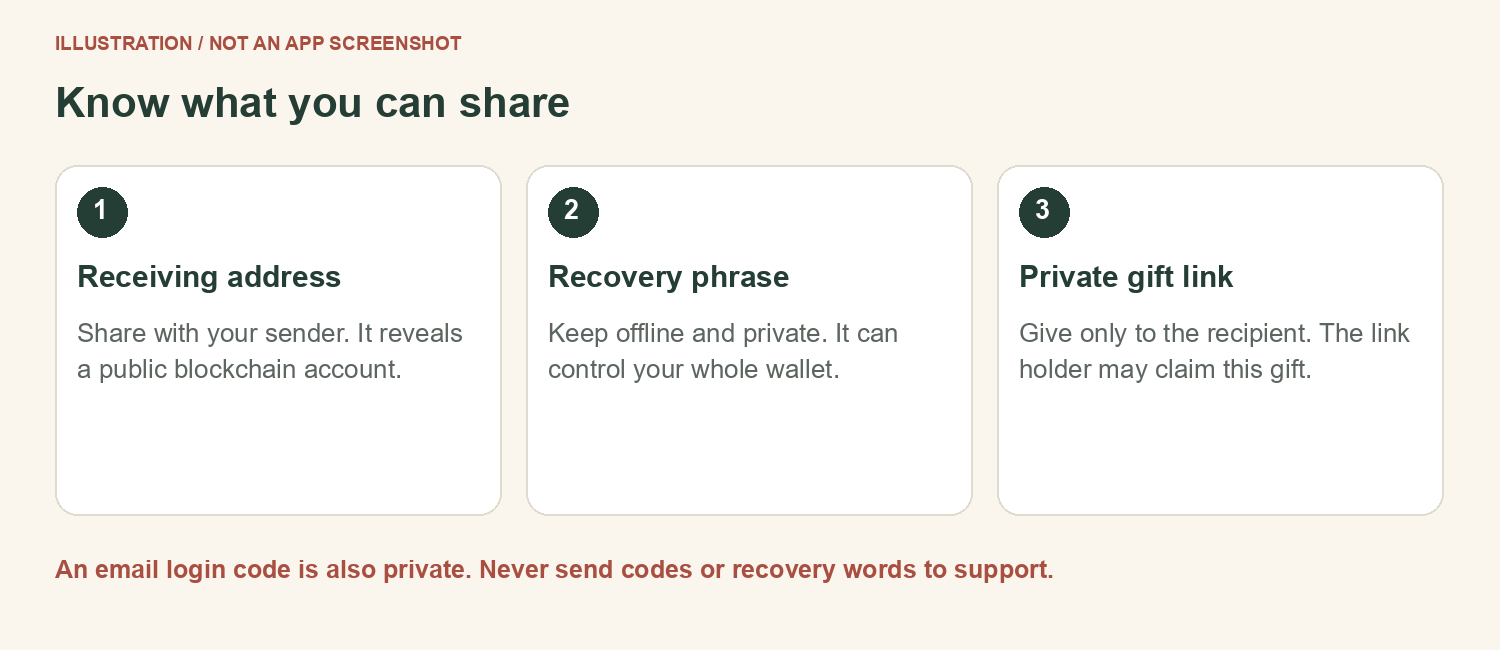
- Your receiving address is like a public destination label. Share it when someone needs to send you tokens; avoid posting it unnecessarily because it can reveal your activity.
- Your recovery phrase or private key controls assets. Nobody helping you buy, gift, claim or link a wallet needs it. Do not photograph it, email it, paste it into this guide, or put it in a Telegram message.
- A private funded-gift link can carry the ability to claim that gift. Do not post it publicly, show it in a screenshot, or include it in a support attachment.
- A sign-in code proves access to your email or account. Enter it only into the official flow you started. It is not a crypto gift claim code.
Sources for this chapter
05 / STEP 1 / DOWNLOAD THE OFFICIAL APP
First, download Jupiter Wallet
Sender and recipient: download Jupiter Mobile, the Jupiter wallet app for iPhone and Android. Use the official links below.
Download Jupiter Wallet for your phone ↗
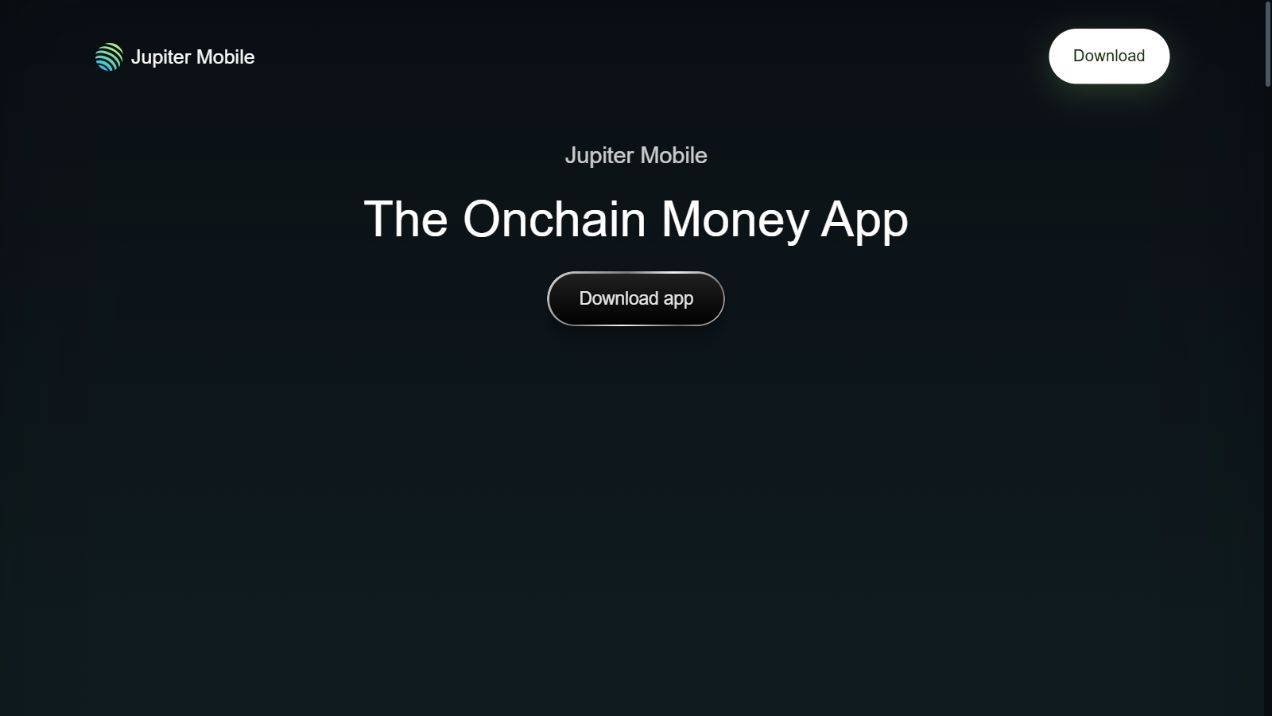
- Open https://jup.ag/mobile yourself. Tap Download or Download app and follow the App Store or Google Play link for your phone.
- The official listing is Jupiter Mobile - Solana Wallet. The developer is Raccoon Labs / Raccoon Labs Pte. Ltd. Check the listing you reached from Jupiter's official links.
- Install it, then tap Open. On a computer, use the Jupiter Wallet extension from https://jup.ag/wallet instead; see page 7.
If the download button does not work, use the App Store or Google Play links in Jupiter's official Mobile FAQ. Check the service is offered in your location before funding.
Sources for this chapter
06 / STEP 2 / CREATE AND BACK UP
Create your Jupiter wallet on a phone
For this walkthrough, choose a new recovery-phrase wallet. Jupiter also offers a Quick Account; its recovery method is different.
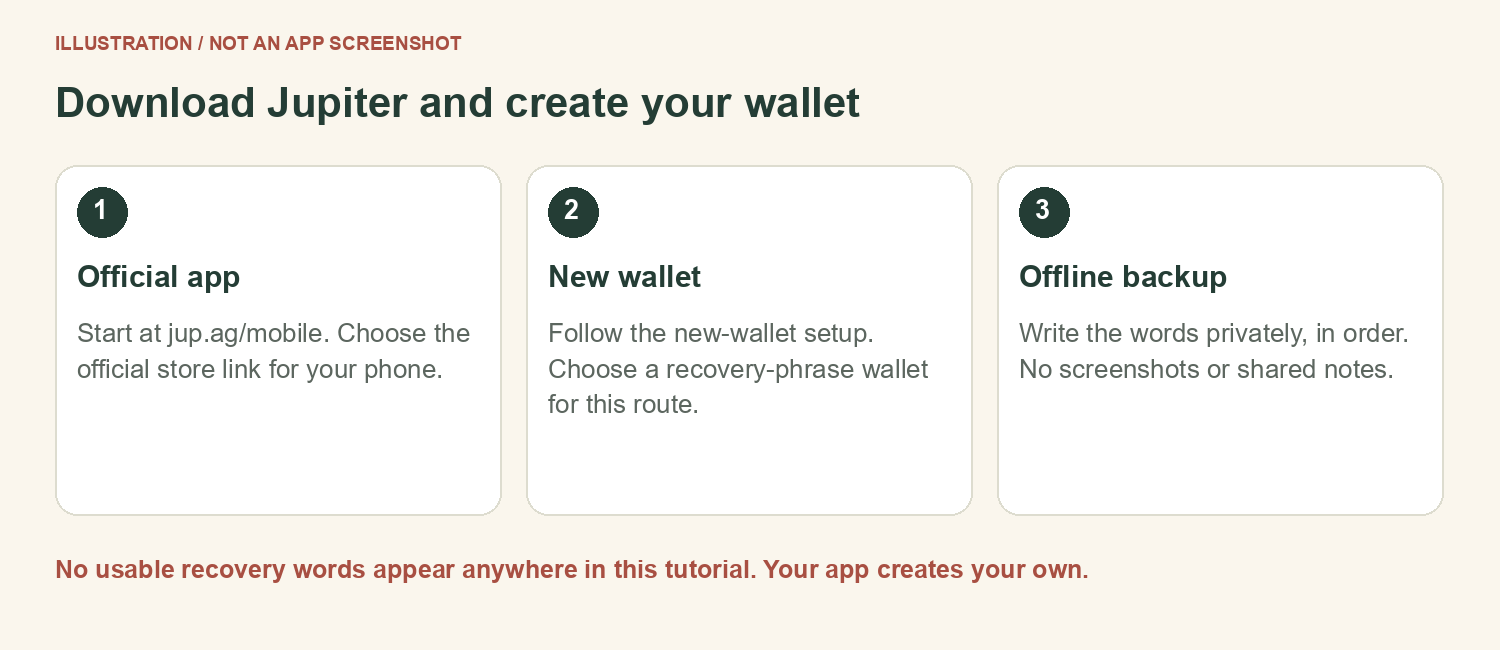
- Open Jupiter Mobile and follow the first-time onboarding. Choose the new recovery-phrase or seed-phrase wallet option offered in your version.
- Privately write down every recovery word in order. Check spelling and order, complete the app's confirmation and store the backup securely offline.
- Enable the available device authentication. Keep the account you just created selected. If the app was already set up, Account Center > Add Account offers Create new seed phrase, or Create seed phrase on Android.
If you choose a Quick Account
Use only the login methods actually offered by the app. A Quick Account has no recovery phrase; protect its sign-in account and follow Jupiter's official private-key backup guidance. Jupiter cannot restore lost credentials for you.
Sources for this chapter
07 / OPTIONAL / COMPUTER SETUP
Jupiter on desktop and your backup check
Phone users can skip the extension steps and complete the backup check. Use the same Jupiter account throughout the buying and gifting journey.
- Open https://jup.ag/wallet and follow the official extension store link for your supported browser. Install Jupiter Wallet and open its icon in the browser toolbar.
- For a new wallet, select Create a new wallet, then New Seed Phrase. Set the local unlock password and follow the backup prompts. The current extension documents a 24-word phrase; record all the words shown to you.
- If you already made your wallet on Jupiter Mobile, use the official Jupiter Sync option if your account type supports it. Follow the pairing instructions on your own two devices and compare the receiving address.
Before adding money
- I know which Jupiter account is selected.
- I have recorded the correct recovery method securely.
- I can reopen my wallet normally without showing its backup.
- I have a device lock and understand which credentials restore my wallet.
- I will review approvals manually; I will not turn on automatic signing to follow a beginner tutorial.
A local unlock password or biometric is not a replacement for your recovery method. Do not reset or delete a working wallet as a backup test. If you cannot explain how to restore it, resolve that before funding.
Sources for this chapter
08 / BEGINNER WALKTHROUGH
Plan the funds before buying
The requested buying page takes USDC on Solana. You also need enough SOL for the costs your wallet and gift review actually display.
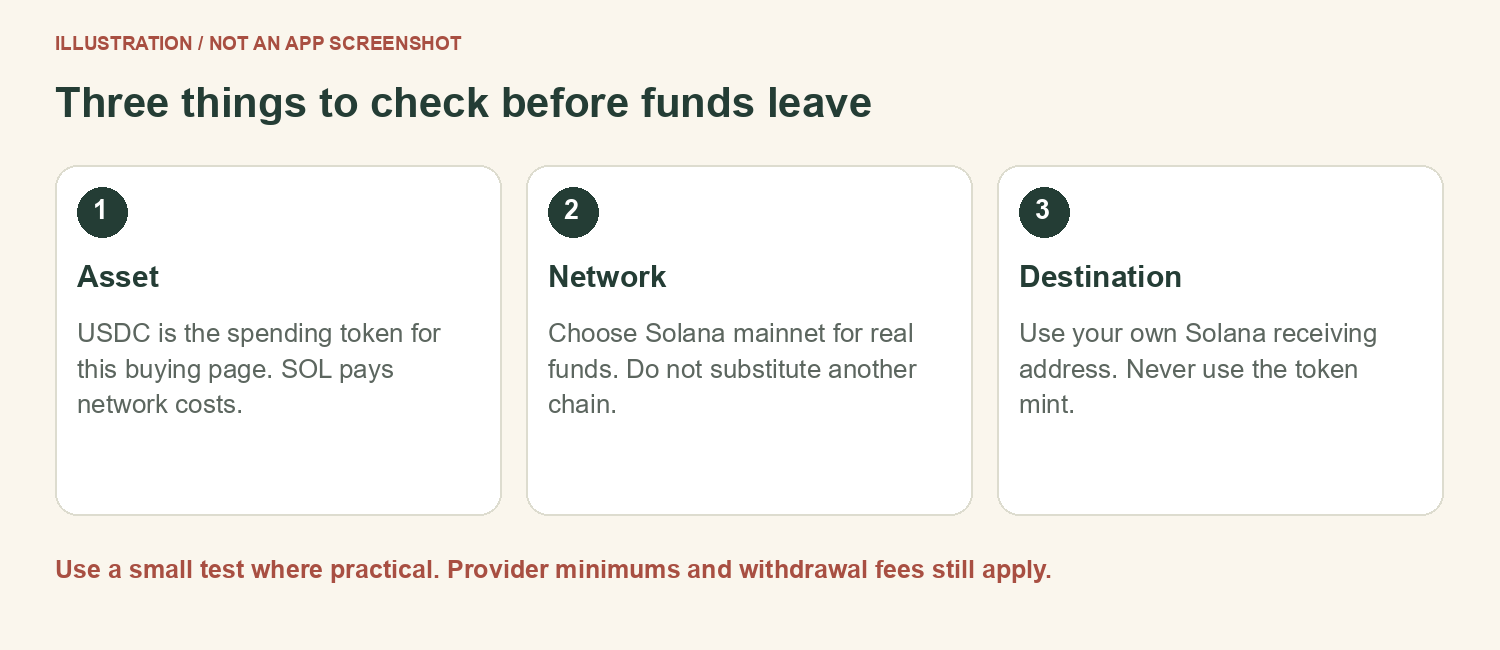
| Balance | What it is for |
|---|---|
| USDC on Solana | The amount you choose to exchange for ARMORED. |
| SOL on Solana | Network fees, any account-creation costs and later gift or transfer costs. |
| ARMORED after the swap | The tokens you can keep or gift. |
Choose a total budget you can afford to lose before opening checkout. Include the payment provider's fee, exchange withdrawal cost if used, swap charges, possible price movement, and the gift's sending costs. Do not spend the entire SOL balance.
For example, a personal $20 total budget is not automatically a $20 swap. The actual purchase and fee screens determine how much remains for tokens. This example is a budget method, not a recommended amount or a live quote.
Sources for this chapter
09 / BEGINNER WALKTHROUGH
Buy USDC with a supported payment method
An onramp is a service that turns ordinary money into crypto. Availability, minimums and payment methods depend on your location and the provider.
- Open the buying page, then choose Buy USDC on Jupiter. The destination linked by the page is https://jup.ag/deposit/onramp.
- Connect the wallet you created, or use its receiving address when the official flow asks. Check that the selected asset is USDC and the destination network is Solana.
- Enter an amount within your total budget. Read the provider name, local-currency total, exchange rate, all charges, USDC to receive and minimum purchase.
- Complete any required identity and payment checks only in the provider's official checkout. Your card details or identity may be required; a wallet recovery phrase is never required for a purchase.
- Keep the provider's order reference. Wait for completion and check USDC in the exact wallet you will use for the swap.
- Arrange a small SOL balance through a supported buy or transfer option. Read its quote too. Do not assume a USDC purchase also supplied SOL.
How to get the SOL balance
If the provider offers SOL, repeat the purchase setup with SOL selected, the Solana network and the same wallet receiving address. Review the new minimum and fee before buying. Alternatively, open your wallet's current Deposit or Buy control and choose SOL if offered, or withdraw SOL on Solana from an exchange using page 10. If you only have USDC and cannot pay the fee for a swap into SOL, stop and arrange a supported SOL purchase or transfer first. Do not assume a gasless option works on this website.
If the card payment is pending
Check the order status before placing another order. A bank charge, provider approval and blockchain delivery can occur at different times. Use the provider's official support with your order reference if necessary.
Sources for this chapter
10 / BEGINNER WALKTHROUGH
Already using an exchange? Withdraw carefully
You can move USDC and SOL from an exchange to your wallet instead of buying through the onramp. Check that the exchange supports the exact withdrawal network.
- In your wallet, open Receive or the current deposit/receive control, choose Solana, and copy your own receiving address.
- At the exchange, select Withdraw or Send for USDC. Choose the Solana network. Compare the pasted destination with the full address shown in your wallet.
- Review the minimum withdrawal, exchange fee and amount that will actually arrive. If a small test is practical within those limits, send it first.
- Wait until the test arrives in the correct wallet, then send the remaining amount you intended. Repeat the address and network checks for every withdrawal.
- Withdraw a small amount of SOL on Solana to cover the displayed costs of your planned actions. USDC cannot normally substitute for a SOL network balance in this website flow.
What the receiving screen means
A QR code can encode the destination. You still verify the decoded address and network before sending. Copying an address is free and does not transfer tokens.
Use a wallet you control as the destination for this tutorial. An exchange account may not support receiving ARMORED, even if it supports SOL or USDC. Never assume it does.
Sources for this chapter
11 / BEGINNER WALKTHROUGH
Open the buying page and connect
Your wallet should now show USDC on Solana and enough SOL for the displayed costs.
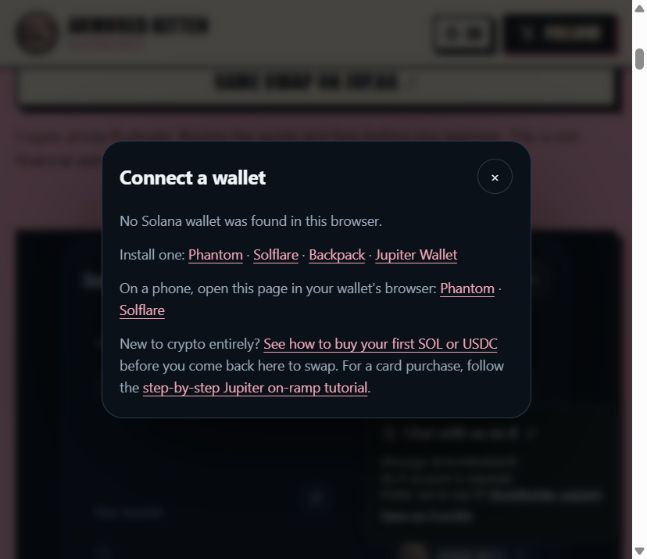
- Open https://community.stonkbuilder.com/creator/armoredkitten/swap. Bookmark the page and check its full address.
- On your phone, open Jupiter Mobile and tap its globe icon for the dApp browser. Enter the full buying-page URL there and verify it before connecting.
- On desktop, use the browser containing the Jupiter Wallet extension. Unlock the correct wallet account.
- Press Connect wallet and select the offered Jupiter wallet option. Read the site and account in the connection prompt. Approve only the connection you initiated. If Jupiter is not offered, stop and use the page's documented Jupiter swap alternative; do not export your recovery phrase to make a connection work.
Sources for this chapter
12 / BEGINNER WALKTHROUGH
Set up the USDC to ARMORED swap
The token you pay and the token you receive must be the ones you intend.
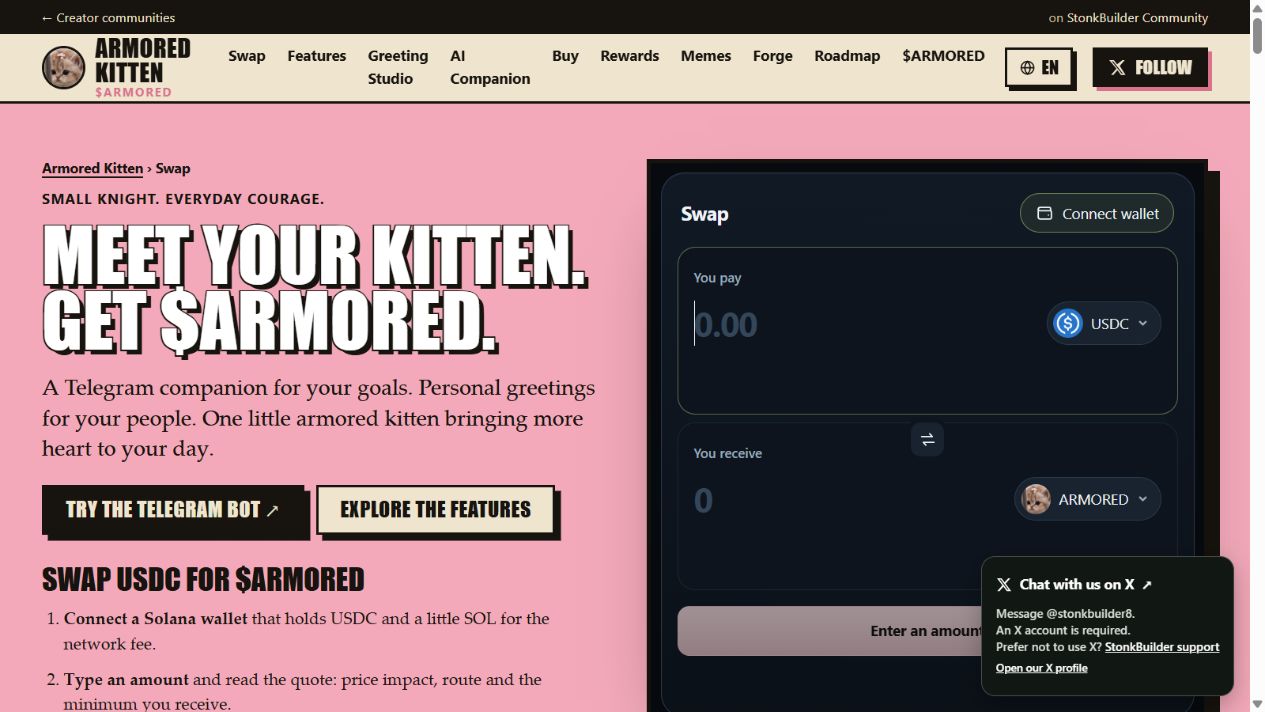
- Find the Swap card. You pay should be USDC and You receive should be ARMORED. Do not reverse the direction by accident.
- Compare the ARMORED token details with the full mint below. A name, logo or unverified badge alone cannot identify the asset.
- Type a small USDC amount within your budget. Wait for a current quote; do not assume the output number is fixed.
Official ARMORED mint
Bq4iwaa2hGWweyCeM9ZNyWnZSj6pCMeUDKZgmtb5pump
USDC on Solana mainnet: EPjFWdd5AufqSSqeM2qN1xzybapC8G4wEGGkZwyTDt1v
If the website cannot connect to Jupiter Mobile, the buying page also explains a native-app alternative: open Jupiter's Trade or swap screen, choose USDC as input and search the output token using the full ARMORED mint above. Read the fresh quote and costs before approving. This is a separate swap interface, with its own displayed fees.
Sources for this chapter
13 / BEGINNER WALKTHROUGH
Understand the quote before signing
Only approve if you can explain what leaves your wallet, what should arrive and what you will pay.
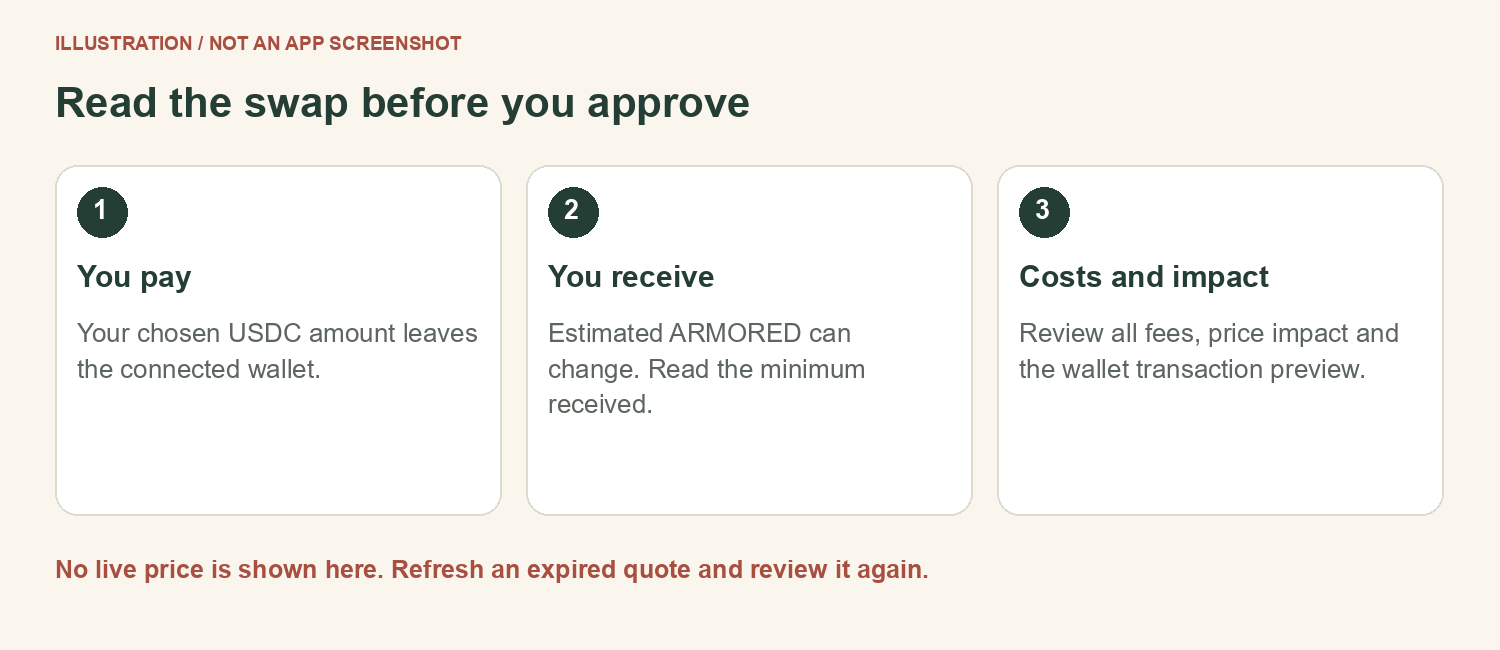
| Quote item | What to check |
|---|---|
| Input | The USDC amount you will spend. |
| Estimated output | The ARMORED expected at the current quote. |
| Minimum received | The lowest output allowed by this swap's current settings. |
| Price impact | How much your trade changes the execution price relative to the quoted market. |
| Slippage | The permitted change between quote and execution. More tolerance increases what you may accept. |
| Route and costs | Trading hops, service or referral fees, and the wallet's SOL cost preview. |
An intermediate token may appear in a multi-hop route. Confirm the final output is the verified ARMORED mint. If a route, warning or charge is unclear, cancel and ask through the official channels.
- Review the wallet transaction details when you request the swap. Confirm the site, input, output and expected changes.
- Approve in your own wallet if satisfied. Wait for a network result. If the quote expires, refresh and review the new one.
Sources for this chapter
14 / BEGINNER WALKTHROUGH
Confirm the purchase and save its receipt
A button click is a request. A confirmed network result and the correct balance establish what actually happened.
- Open the wallet's recent activity after the swap. Find the transaction and its confirmed or finalized status.
- Check that the input USDC decreased as expected and the verified ARMORED token arrived in the same wallet account.
- If the token is hidden, use the wallet's token visibility controls or search by the full mint. Do not buy a second time just because a balance is slow to refresh.
- Open the transaction in the block explorer from the wallet activity if needed. Check the asset and balance changes. You can also use https://explorer.solana.com or https://solscan.io.
- Keep a simple private record of the date, purchase amount, charges and public transaction reference. You may need records for your local reporting obligations.
A useful receipt contains
- Which wallet account you used.
- The exact token and network.
- The confirmed transaction reference.
- How much you spent and received.
- Any provider order reference if you bought crypto by card.
You now have tokens to gift. Go to the greeting route on page 16, or the direct-wallet route on page 23.
Sources for this chapter
15 / BEGINNER WALKTHROUGH
Choose how your recipient will receive it
Ask the recipient which route they can use before you fund a gift.
| Greeting plus gift link | Direct wallet transfer | |
|---|---|---|
| Recipient needs | Jupiter Mobile at claim time, supported in their location. | A compatible Solana wallet they already control. |
| What you share | A private greeting or gift link. | You ask them for their Solana receiving address. |
| When tokens arrive | After the funded gift is claimed. | After the transfer confirms. |
| Recovery | Only available for an eligible unclaimed invite through the supported flow. | No ordinary cancellation once confirmed. |
| Personal message | Included in the Greeting Studio. | Send a separate greeting if you want. |
A gift link helps someone who does not yet have a wallet, but it still requires a supported claim app and secure setup. Jupiter currently lists restrictions including the United States and China. Check the current official terms and availability for the actual recipient.
For a direct gift, agree on the token amount and have the recipient verify the address through your existing conversation. Do not rely on an address copied from a new message by an unknown account.
Sources for this chapter
16 / BEGINNER WALKTHROUGH
Create the personal greeting
Start at the Greeting Studio. If you begin in the companion bot, /gift opens the Studio; the command does not transfer tokens.
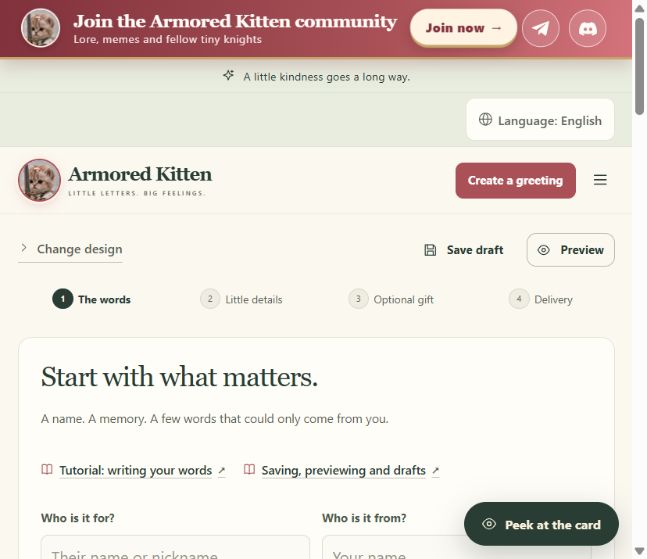
- Open https://armoredkitten.stonkbuilder.com/ and select Create a greeting. Choose an occasion and design that suits the recipient.
- In The words, enter the recipient's display name and your name. These are the names on the card, not delivery email addresses.
- Edit the front text and personal message. A shared memory or simple thank-you is enough. Choose an available language and tone if you want.
- Use Preview to check your words and spelling. A preview is not a published greeting or a funded gift.
Sources for this chapter
17 / BEGINNER WALKTHROUGH
Add details and preview the card
Make it personal before you add a financial step.
- Open Little details. Choose the available layout, color palette and opening style.
- Add an optional photo you have permission to share. Check the picture itself for private information before uploading.
- If offered, add an inside joke or pocket notes. These are surprises within the greeting, not separate password-protected messages.
- For a voice note, record only what you want the recipient to hear. Listen to the whole recording and remove it if you are unhappy with it.
- Preview the greeting. On a phone, check that names, text, buttons and media are comfortable to read and use.
- If you want a plain card, leave Just my thoughtful greeting selected and continue to Delivery. A card does not require a crypto purchase.
Saving and sharing are different
Save draft keeps work for later once you are signed in. Preview displays it for checking. Creating or publishing the private greeting is a separate action. Follow the current confirmation shown by the Studio.
A keepsake image cannot operate a token claim or play a voice recording. If you use a downloaded version, preview what it includes. The online private greeting remains the place for its supported interactive features.
Sources for this chapter
18 / BEGINNER WALKTHROUGH
Select the optional ARMORED gift
The live form showed this option on 1 November 2026. Availability can change; use only the option actually offered to your account.
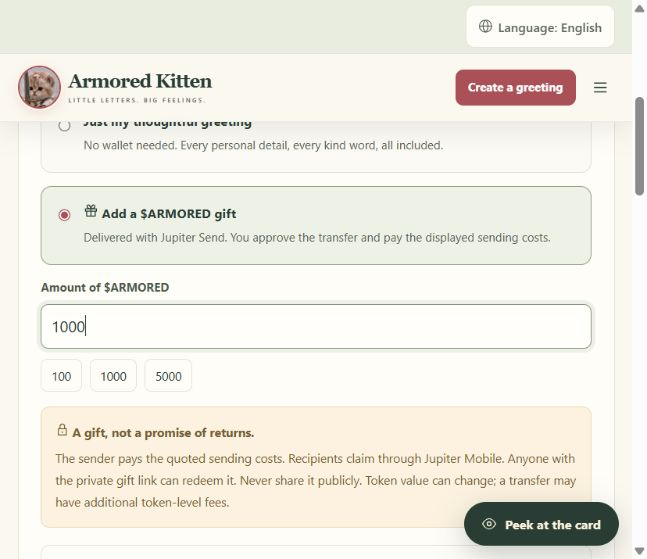
- In Optional gift, select Add a $ARMORED gift. Read the Jupiter Send and private-link warning.
- Enter the number of ARMORED tokens you intend to give. Check that you hold enough in the sender wallet. The number is not a dollar amount.
- Read the summary. Sending costs are quoted before approval; token-level effects can also matter. Go to Delivery details when ready.
The sender minimum is US$2 at a fresh verified price
For the updated sender flow, the service calculates the minimum ARMORED quantity from a fresh verified price. A fixed number such as 1,000 tokens may be too small. If pricing is unavailable, stale or the minimum exceeds your permitted maximum, stop; do not bypass the review or increase spending blindly. The rule is checked again before the first submission.
Sources for this chapter
19 / BEGINNER WALKTHROUGH
Choose delivery and verify your email
The card names and the delivery addresses are different. Check both.
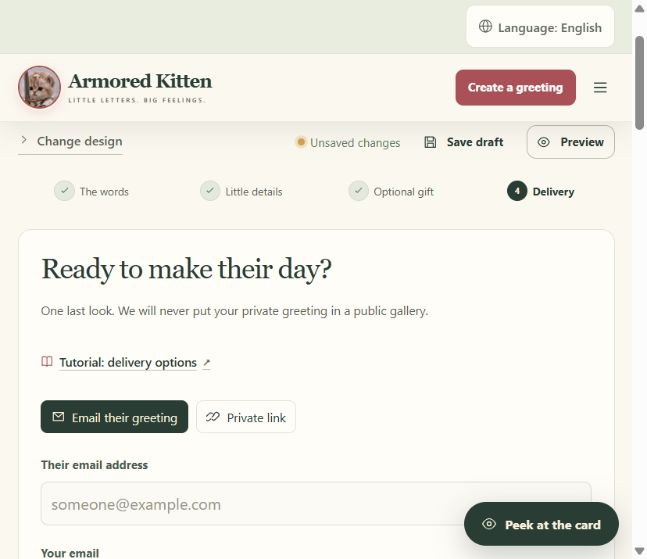
- For email delivery, choose Email their greeting and enter the intended recipient's email accurately. Have permission to contact them.
- For manual sharing, choose Private link. You will share the resulting private link yourself; selecting the option does not message the recipient.
- Enter your own email in the sender field. Use Send my code only when you are ready for the service email. Enter its one-time code in the official verification flow.
- Review the privacy notice, terms, recipient details and required confirmation. Keep the code and any later private gift link out of public screenshots.
Signing in and confirming a send use different codes
The updated gifting flow sends a separate send-confirmation code to the verified sender inbox. Check its recipient and token amount. For ordinary email delivery, review and retype the full recipient email after verification. For a private link or a reply with a hidden address, use the specific destination confirmation shown. A sign-in code does not authorize the gift. If details change, follow the new confirmation request.
Sources for this chapter
20 / BEGINNER WALKTHROUGH
Review and fund the gift in your wallet
The live delivery screen labels the next action Review & fund gift. Read every later review screen before approving.
- Check recipient, token amount, delivery, expiry and the fresh-price US$2 sender minimum. Make sure the correct Jupiter wallet holds ARMORED and the displayed costs.
- Request the separate send-confirmation code for this gift. It goes to the verified sender inbox, expires after ten minutes and locks after five wrong attempts. Read the recipient and amount in the email.
- Verify the code. For ordinary email delivery, retype the full recipient email. For a private link, confirm that no email will be sent; for a reply with a hidden address, confirm the original sender shown. The bound approval lasts up to five minutes. Edits to recipient, content, amount, delivery or schedule require a fresh confirmation.
- When the Studio asks, connect the same Jupiter wallet holding your tokens. Connecting on the buying page did not connect it here. Review and sign the ownership message: this proves wallet control, not a payment, and moves no tokens.
- Back in the Studio, review the recipient, token amount, mint, expiry and quoted SOL costs. Choose Approve in my wallet, then review the separate financial transaction in Jupiter. Cancel unexpected movements or authority. Approve only the intended gift.
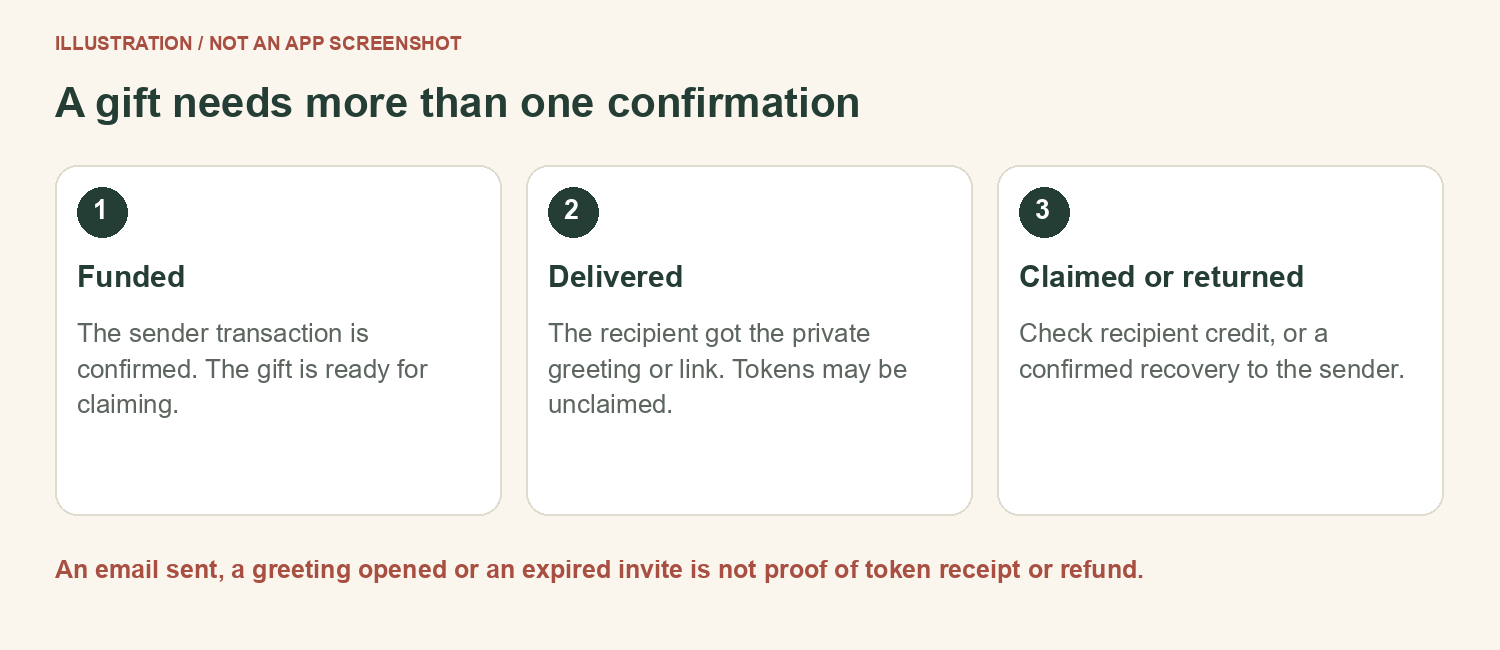
- Wait for confirmed funding, then check publication or delivery. For a private link, share it only with the intended person. An uncertain result must be checked before retrying.
The public controls were inspected for this tutorial. No wallet-funded approval or claim was executed, so this guide does not show or claim a successful real-money gift receipt.
Sources for this chapter
21 / BEGINNER WALKTHROUGH
Recipient: claim your gift safely
Reading the greeting does not claim the tokens. These are the separate recipient steps.
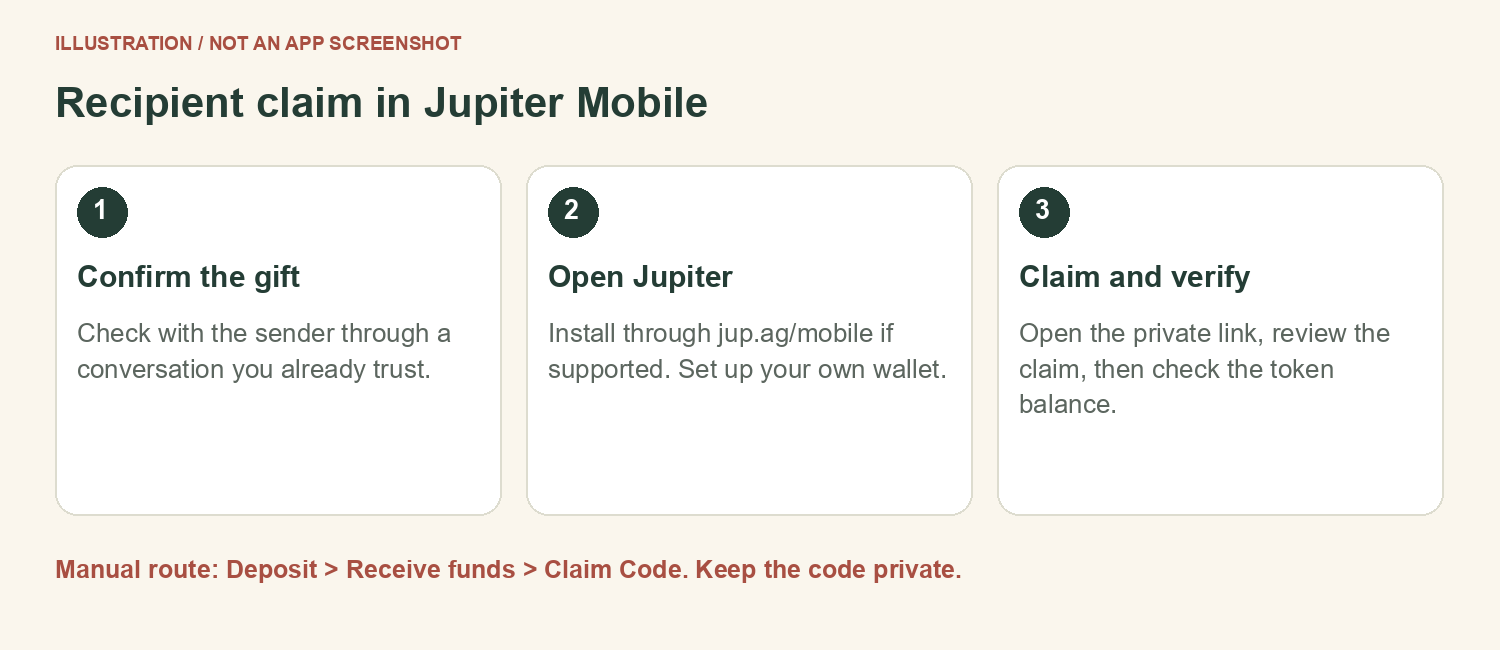
- Confirm with the sender that they intended this gift. Use a conversation or contact method you already know.
- Check whether Jupiter Mobile is available for you. Install it through https://jup.ag/mobile. Create your own wallet and follow the backup guidance for its account type.
- Return to the original greeting email after installation, not the sender's design preview. Preview only has no redeemable gift. In the actual recipient greeting, open View gift or View private gift, then Claim gift in Jupiter. If needed, use Deposit > Receive funds > Claim Code in the official app.
- Review the token, amount and destination shown in the app. Complete the claim only if they match what you expect. Never enter recovery words on the greeting or a claim website.
- Check the ARMORED balance in the receiving wallet and its transaction result. Tell the sender when the tokens actually arrive.
Sources for this chapter
22 / BEGINNER WALKTHROUGH
Track an unclaimed gift or a return
Keep the original sender wallet available. Returning an eligible unclaimed gift is different from reversing a completed claim.
- In your Studio account, open My greetings > Details for the saved greeting. Read its current gift state, timestamped activity, public transaction reference and invite-specific expiry.
- If the recipient has not claimed, remind them privately and check their app availability. Do not repost the gift link in a public channel.
- If the link leaked, check whether the gift is still unclaimed and whether the supported recovery action is available. A third party may claim before recovery confirms.
- If the product offers recovery, read the exact action and costs, use the original sender wallet, and check the resulting transaction. Submitted is not the same as returned.
- Verify the returned asset and balance in the sender wallet. Keep the record until the return is confirmed. Use official support if the state is unclear.
Do not assume every gift has the same deadline
Jupiter documents seven days for Magic Links created in its Mobile flow. An Armored Kitten integration must be read using that invite's own expiry and current controls. Do not substitute a generic deadline or assume expired means refunded.
Ask support using a public transaction reference and a redacted description. Never attach the private greeting URL, claim code, recovery words or sign-in code.
You cannot move a funded gift to a different recipient email through a delivery retry. Recover the existing unclaimed gift, or wait for a confirmed claim or return, then create a new greeting if the recipient must change. This is not an extra payment. Use the original sender wallet for an offered recovery action.
Sources for this chapter
23 / BEGINNER WALKTHROUGH
Alternative: send directly to their wallet
Use this when the recipient already controls a compatible Solana wallet and wants ARMORED there.
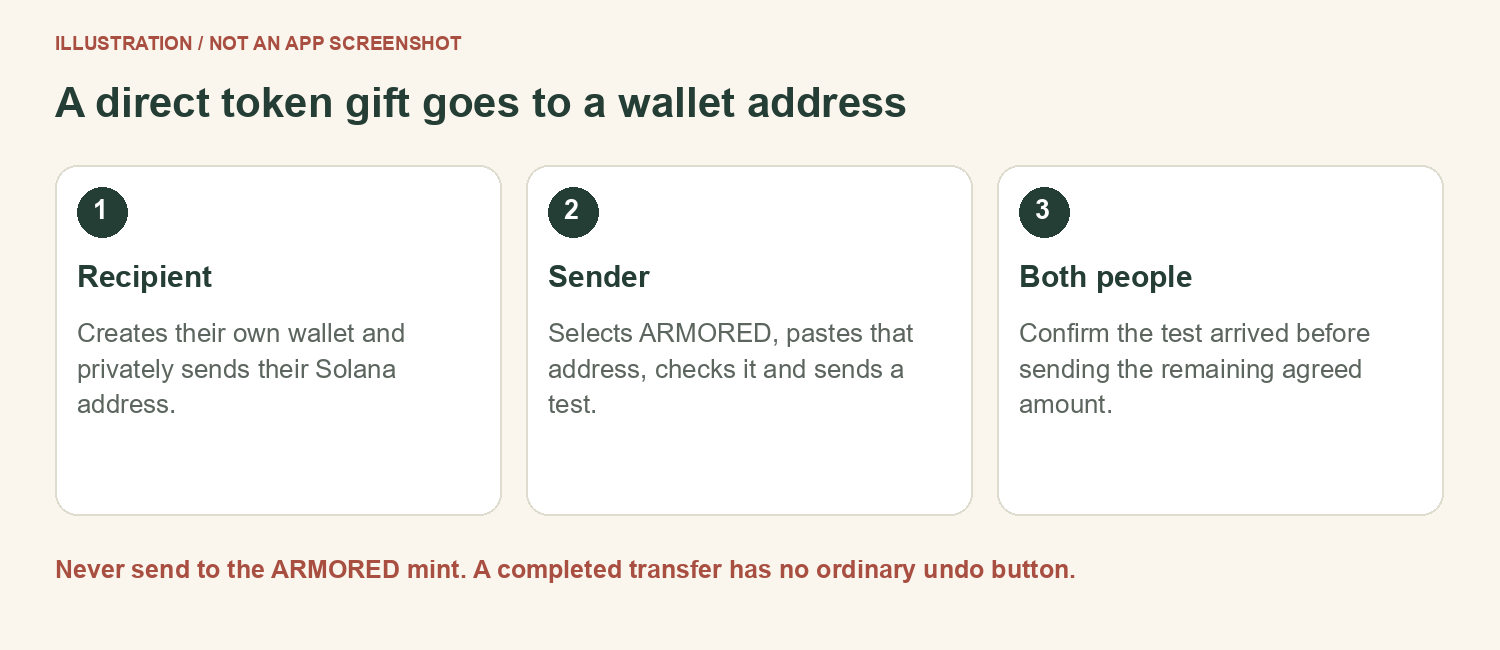
- Ask the recipient to open Jupiter Mobile > Deposit > Receive funds, choose the ordinary Solana wallet receiving address, and copy it. Verify the full address through your established conversation.
- In your Jupiter Mobile wallet, tap Send, then Send to address. Paste the recipient's verified Solana wallet address.
- Select the verified ARMORED token and enter a small test quantity you both agree on. Compare the complete destination again; beware of clipboard changes and look-alike addresses in history.
- Review the token, amount, recipient and costs, then confirm only the intended transfer. Wait for a confirmed result.
- Have the recipient check the exact asset arrived. Repeat all checks before sending the remaining agreed quantity.
Sources for this chapter
24 / BEGINNER WALKTHROUGH
Recipient: receive and keep control
A direct gift has no private claim link. Its destination is the wallet address you provided.
- Create and secure your own wallet if needed. Never use a wallet whose recovery phrase was sent to you by someone else.
- Check the network is Solana. Send the sender your receiving address, not your recovery phrase or private key.
- Agree on the test quantity, then confirm it in your wallet activity and the ARMORED token details.
- If a balance is hidden, check token visibility by the full mint. Ask the sender for the public transaction reference if needed.
- Confirm receipt before the sender sends more. Keep your recovery method secure and learn how to review future wallet approvals.
Will I need SOL?
Simply receiving a normal transfer does not mean you must approve a payment in your own wallet. To later send, swap or interact, you generally need SOL for the network costs, unless the specific app offers a quoted fee-sponsorship route. Check the actual preview; do not assume it is free.
If you want to sell later
Selling is a separate optional decision. A supported swap can exchange ARMORED back to another asset if a route and liquidity exist. Review fees and price impact again. Selling into a wallet token is not the same as withdrawing ordinary money to a bank.
Sources for this chapter
25 / BEGINNER WALKTHROUGH
Gifting companion access or a subscription
This is a different goal from giving tokens. Do not promise a paid period simply because a gift was funded or claimed.
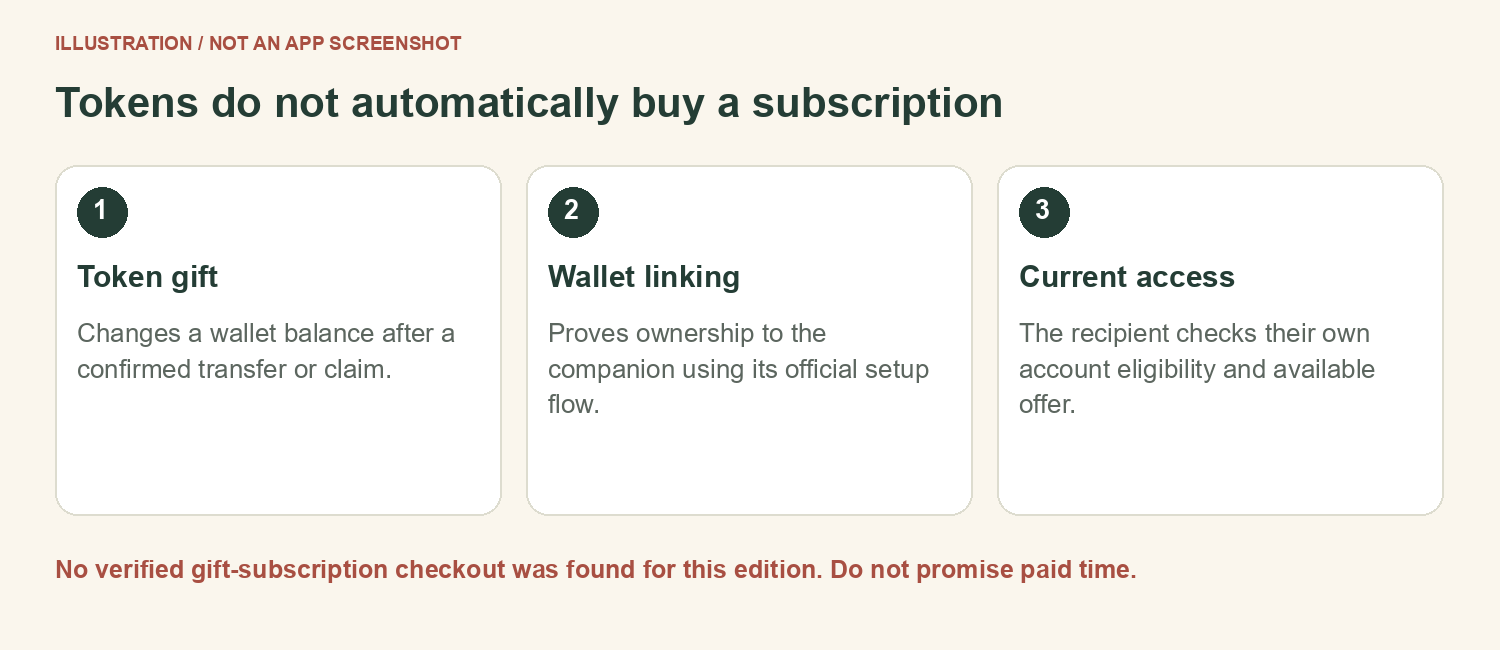
What is available in this edition
The companion offers an adult seven-day trial subject to current account and consent checks. Holder access is available only if the current official service enables that route and your account and wallet meet its rules; owning tokens alone is not enough. Where a paid Plus checkout is enabled, it is tied to the current account and its payer. No verified checkout for gifting a subscription to another account was found for this edition.
What you can do now
- Send the recipient the official companion link: https://t.me/armoredkitten_bot. They open their own chat, tap Start and read the current welcome and access options.
- If the current service offers holder access and you intend tokens to help with its requirement, explain that the recipient must claim or receive them, link their own eligible wallet and pass all current account checks. A token quantity does not guarantee a USD threshold or eligibility.
- If the purpose is specifically a paid subscription, wait for an official supported gifting offer. Check the named beneficiary, period, total charge, renewal and refund terms before paying.
Sources for this chapter
26 / BEGINNER WALKTHROUGH
Help them link the right wallet
Only do this if the recipient's current official onboarding asks for a wallet. Buying and gifting alone do not finish account setup.
New to Telegram? Start at https://telegram.org and follow its official download link for your device. Set up your own Telegram account using its normal prompts. Keep Telegram sign-in codes private, then open the exact bot link from this guide.
- The recipient starts in their own private @armoredkitten_bot chat and follows its current welcome. They complete any age, account, email or consent steps that actually appear.
- When a wallet-link prompt is offered, open the fresh private link from that chat. Do not reuse someone else's setup link.
- Choose an offered compatible wallet and the account holding the received ARMORED. Compare its full Solana address with the receiving wallet used earlier.
- Read the ownership-proof message in the wallet. The documented linking flow is a message signature, not a token transfer. Cancel any unexpected spending request.
- Return to the same bot chat and check its result and current access status. If invited, open the private dashboard from the bot, using the same Telegram account.
If access is not granted
Check the current requirement, token value, correct account, wallet proof and any remaining setup prompts. A gift can fall below a holder threshold as the market moves. Ask through official support instead of repeatedly buying more without understanding the result.
The recipient can make their own notification choices in the companion. Let them decide whether to keep, reduce or stop reminders.
Sources for this chapter
27 / BEGINNER WALKTHROUGH
When funding or buying gets stuck
First identify the stage. Repeating a payment is rarely a good first troubleshooting step.
| What you see | What to check next |
|---|---|
| No wallet found | Open the site in a supported wallet browser on mobile, or the desktop browser with the extension installed. Unlock the correct account. |
| USDC missing | Check provider order or exchange withdrawal status, network and the full destination address. Look in the exact wallet used at checkout. |
| Not enough SOL | Read the actual fee preview. Add enough SOL through a supported route; do not spend the entire SOL balance. |
| No swap route | Refresh once and check input/output mints and amount. A route may be unavailable. Do not use an unrelated look-alike token. |
| High price impact | Reduce the proposed amount or cancel. Do not treat the displayed output as a fair-price guarantee. |
| Swap rejected or expired | Check wallet activity first. If nothing was submitted, obtain a fresh quote and review it. If submitted, check the transaction result. |
| ARMORED hidden | Check the full mint and token visibility settings or inspect the transaction and wallet on a block explorer. |
| Browser timed out after approval | Use the saved transaction reference and wallet activity before any retry. The network may already have processed the transaction. |
Sources for this chapter
28 / BEGINNER WALKTHROUGH
When gifting or claiming gets stuck
Keep the distinction between delivery, a token claim and companion access.
| What you see | What to do |
|---|---|
| No email code | Check your sender email and spam folder. Follow retry limits. Use the latest official code in the verification flow. |
| Recipient got no email | Check recipient spelling and current delivery state. A queued or provider-accepted message may not have reached the inbox. |
| Greeting opens but no tokens | Look for the funded gift and separate claim action. A greeting can exist without a funded gift. |
| Claim link opens a browser | Install the supported official Jupiter app, then reopen the link. Use its documented Claim Code option if needed. |
| App unavailable in the region | Do not bypass restrictions. Stop that route; use a permitted compatible direct transfer only if both people can use it, or give a plain card. |
| Expired or already claimed | Read the invite state. Do not promise cancellation or a return for an already completed claim. |
| Return still pending | Check the recovery transaction and actual sender balance. An expiry or submitted recovery does not prove funds returned. |
| Tokens arrived, access missing | Return to official companion onboarding. Check linked wallet, current eligibility and account setup. A token gift is not a paid subscription. |
Scam signals
Stop if someone asks for recovery words, a private key, remote device access, a payment to unlock a refund, or a send-one-get-two transfer. Ignore unsolicited support messages. Use contact links you reached from the official sites.
Sources for this chapter
29 / BEGINNER WALKTHROUGH
The final checklist
Use this page together before and after the gift. You can stop at any stage that feels unclear.
Sender: before spending
- I chose a budget including fees and understand that token value can fall.
- I downloaded Jupiter Wallet from its official links and secured its recovery method.
- I have USDC on Solana for the swap and enough SOL for the displayed costs.
- I verified the full ARMORED mint and reviewed the actual quote.
- I know whether the recipient wants a Jupiter claim gift or a direct wallet transfer.
Sender: before sharing
- The amount is in ARMORED tokens, not dollars.
- I checked the recipient, delivery details, amount, expiry and wallet approval.
- Funding is confirmed, or I am checking its status before retrying.
- I will share private links only with the intended recipient.
Recipient: before calling it complete
- I created and secured my own wallet.
- I verified the gift with the sender and used the supported official claim route if needed.
- I checked the correct token balance and transaction result.
- I understand that receiving tokens does not automatically create a subscription.
- I checked my own companion access and notification preferences if I chose to join.
Sources for this chapter
30 / BEGINNER WALKTHROUGH
Official links and next steps
Use these saved destinations instead of links sent by strangers. The buying button below goes to the exact page requested for this tutorial.
Recipient only? Follow the existing claim guide ↗
| Purpose | Official destination |
|---|---|
| Create a greeting | https://armoredkitten.stonkbuilder.com/ |
| Companion bot | https://t.me/armoredkitten_bot |
| Download Jupiter Wallet for phone | https://jup.ag/mobile |
| Jupiter Wallet for desktop | https://jup.ag/wallet |
| USDC onramp linked by the buying page | https://jup.ag/deposit/onramp |
| Community updates | https://t.me/armoredkitten |
| Follow on X | https://x.com/armoredkitten8 |
Documentation used
Wallet setup: Jupiter Mobile wallet creation and backup, the Mobile FAQ and Jupiter Wallet desktop setup. Tokens: Circle's USDC address list and Solana's fee documentation. Claiming: Jupiter Mobile funding/claim documentation and its FAQ. Product steps: Armored Kitten Greeting Studio tutorial, gift guide, access page and wallet-linking guide. Each chapter links its relevant sources below the content; the HTML edition makes them clickable.
About the visuals and verification
Live screenshots capture public website controls; the sample greeting uses fictional names. The cover is an original AI-generated illustration. The diagrams are original educational graphics. No real wallet was created, funded transaction approved, email sent, or recipient claim performed for this guide. Post-approval screens are explained in words instead of presented as verified receipts.
This edition is educational product onboarding, not a promise of financial returns or a recommendation to spend. Follow current fees, legal availability and account requirements when you use the apps.
Sources for this chapter
- Buy $ARMORED and beginner tutorial ↗
- Jupiter Mobile wallet setup ↗
- Jupiter wallet backup and security ↗
- Jupiter Quick Account recovery ↗
- Download Jupiter Mobile ↗
- Jupiter Wallet on Google Play ↗
- Jupiter Wallet on the App Store ↗
- Jupiter Wallet desktop setup ↗
- Sending from Jupiter Mobile ↗
- Jupiter Mobile funding and claims ↗
- Jupiter Mobile availability and recovery ↗
- Jupiter unclaimed invite recovery ↗
- Circle USDC addresses ↗
- Solana network fees ↗
- Greeting Studio ↗
- Greeting Studio tutorial ↗
- Gift claims and returns ↗
- Companion access ↗
- Link a wallet to the companion ↗
- Token gifts and companion access ↗
- Armored Kitten gift safety ↗
Get help safely
For the greeting or its delivery, contact the support address published by this site: support@stonkbuilder.com.
For Jupiter app setup or a claim, use Jupiter support ↗. Keep wallet recovery words, private keys, pairing codes, one-time sign-in codes and gift codes private.
This public tutorial cannot find a personal gift or verify a balance. Share only a public transaction reference and a redacted description through the relevant official support channel.